Now that I am no longer employed and am focusing on my designs full time, I have more spare time on my hands. So needless to say, when I found out my parents needed some sweets to enter into a contest for their company event this evening (with notice, of course!), I volunteered to make them something to bring. This was my favorite pick so I decided to go for it! I will let you be the judge...
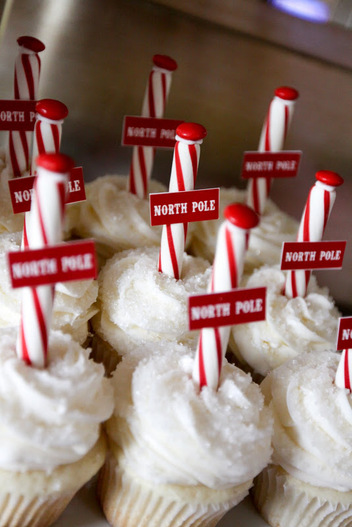
I found these adorable cupcakes via Pinterest (duh!) but it was just images from a party. I decided this was definitely something I could make. The original post I found is from Jenny Cookies and is pictured below.
There were no instructions so I had to make it up as I went along, but they are pretty simple and self-explanatory.
I took a box of chocolate fudge cake mix and prepared it according to the instructions on the box, except I added about 1-2 cups of semi-sweet chocolate morsels for extra goodness. I lined & greased the mini cupcake pan & filled the cup a little more than 3/4 full. (This made about 55+ mini cupcakes.) A tip I recently saw on Pinterest said to preheat your oven to 350 degrees as instructed when making cupcakes but when you put them in the oven, turn it down to 325 degrees and they will come out perfect... I was willing to test this theory today since I had the time. Regular cupcakes were supposed to bake for 18-24 minutes so I checked them at 15 minutes and they were perfect & puffy!
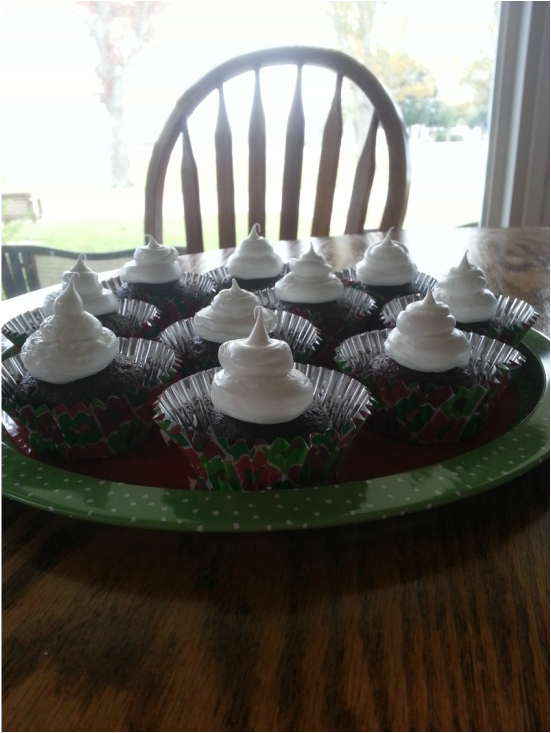
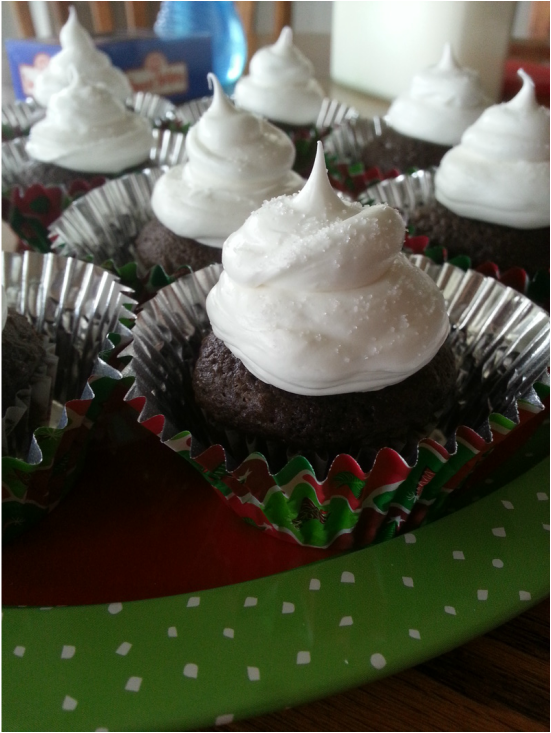
Then I used classic fluffy white icing & my piping set to make my first ever attempt at pretty cupcakes... Look how those peaks are! I have never nailed it so well on my first shot! I almost cried I was so proud of myself... :) They were baked inside plain white mini cupcake liners & when serving them onto the tray to decorate them, I placed them into regular size cupcake liners to hold them better & separate easier for picking up tonight.
I took a box of chocolate fudge cake mix and prepared it according to the instructions on the box, except I added about 1-2 cups of semi-sweet chocolate morsels for extra goodness. I lined & greased the mini cupcake pan & filled the cup a little more than 3/4 full. (This made about 55+ mini cupcakes.) A tip I recently saw on Pinterest said to preheat your oven to 350 degrees as instructed when making cupcakes but when you put them in the oven, turn it down to 325 degrees and they will come out perfect... I was willing to test this theory today since I had the time. Regular cupcakes were supposed to bake for 18-24 minutes so I checked them at 15 minutes and they were perfect & puffy!
Then I used classic fluffy white icing & my piping set to make my first ever attempt at pretty cupcakes... Look how those peaks are! I have never nailed it so well on my first shot! I almost cried I was so proud of myself... :) They were baked inside plain white mini cupcake liners & when serving them onto the tray to decorate them, I placed them into regular size cupcake liners to hold them better & separate easier for picking up tonight.
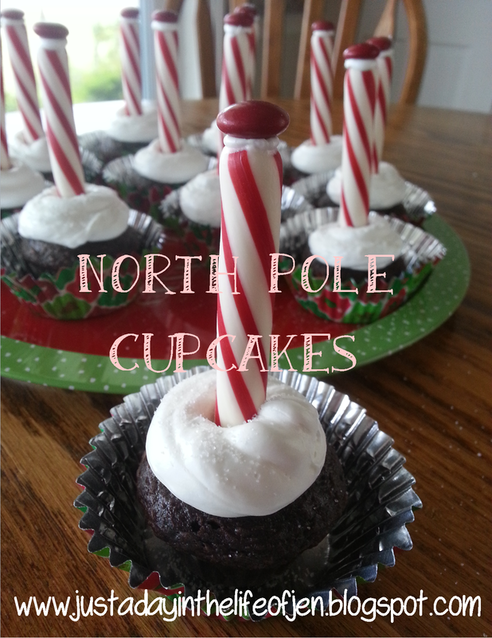
I then sprinkled the cupcakes with sugar as shown in the original photo I was inspired by. I found that you can do this now or after inserting your candy cane sticks, but if you do it before, you will probably want to do it again after to get better coverage.
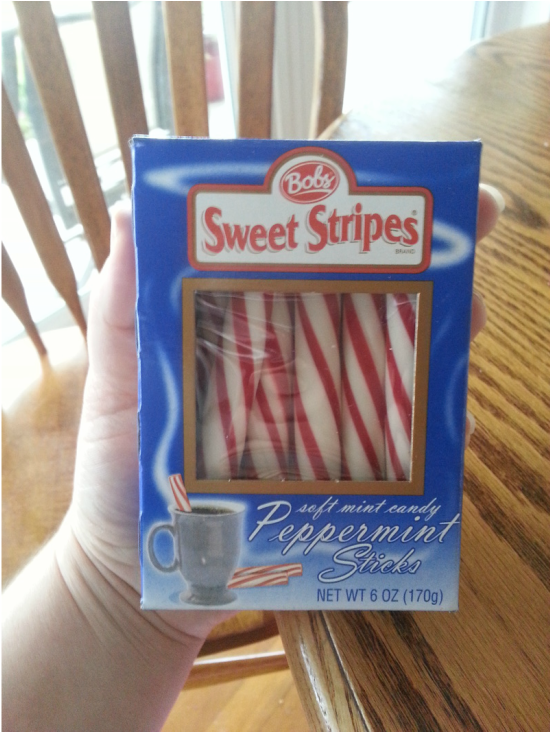
These are the candy cane sticks I used. I found them at Walmart when I intended on making full size cupcakes and they were sold for about $1 per box of 12 sticks. Just insert them into your cupcakes slowly and try to keep them straight.
Now you just put a dab of icing on top of the candy cane sticks and stick a red M&M on top of it with the "M" facing down and make sure to snap some pics of your adorable cupcakes!

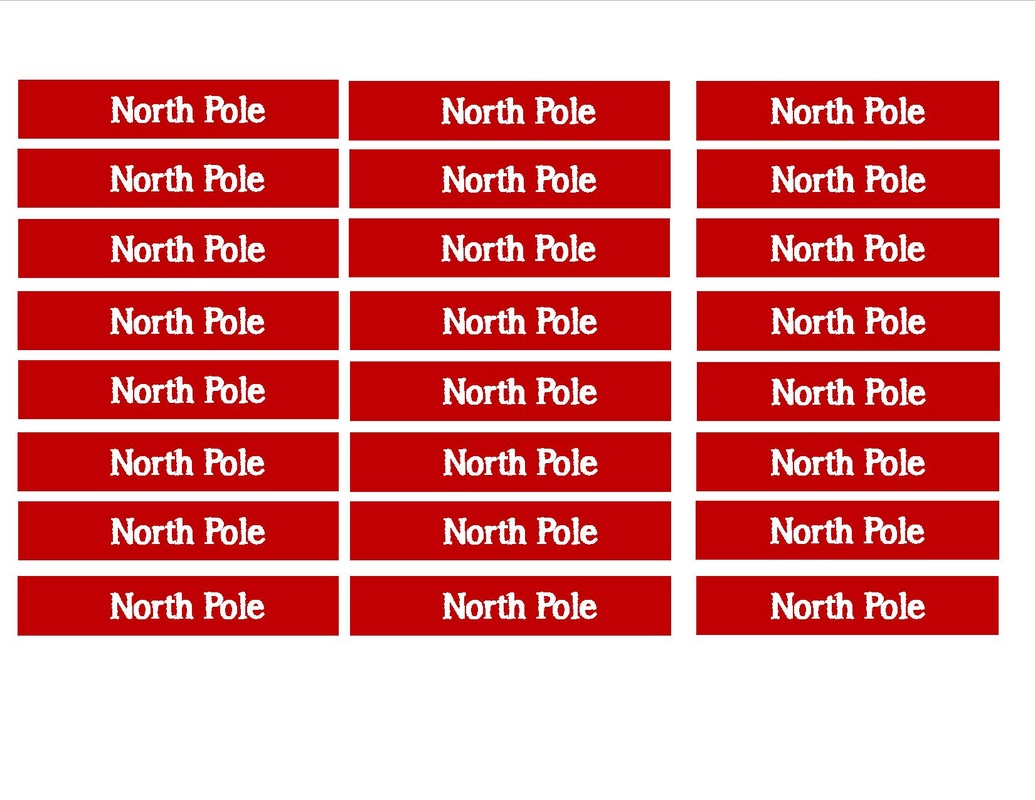
The original creator had some small typed signs on each cupcake, so I created a sheet of 24 signs to print if you want to use them for free. I just need to figure out how to best affix the sign to the candy cane stick and otherwise I have a small stand-alone sign to send along. Click below to download the PDF.
Here is the gift I was commissioned to create for them to give tonight as well. What do you think?
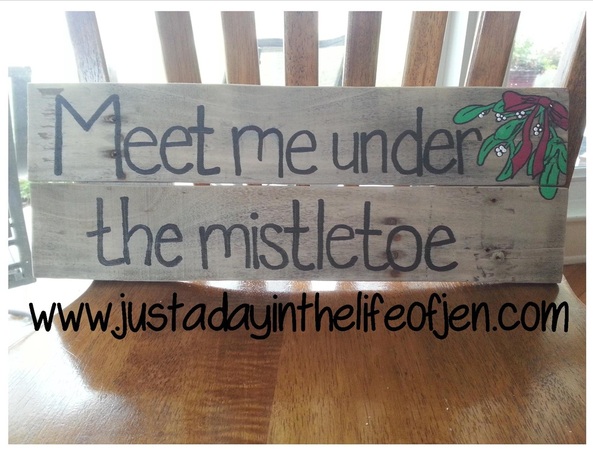
It is all hand-painted onto pallet wood like most of our signs. Mom likes the Texas flair!

 RSS Feed